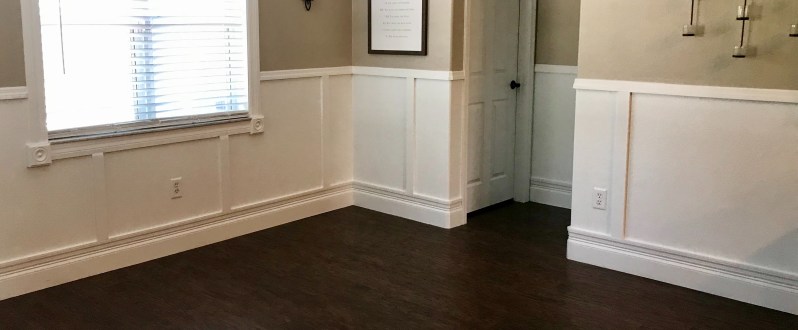
Do you ever see decorating or remodeling ideas online, but they are never quite exactly what you are looking for? Well, Welcome to my morphing of Chair Rail, Wainscoting and Board and Batten!
I LOVE the look of older homes with everything from walls, windows and ceilings being covered with moulding. Obviously with my home being built in 2006, it is in no matter an old or victorian style home, but I wanted to add some character to it.
Let’s get started with the supplies needed to achieve this look, or a similar one that fits your style.
We already had updated the home with these 5.25 inch baseboards when we replaced the flooring years ago. These are a great start to getting the thick moulding style shown above but you can use any baseboard that fits your style.
The first thing we did was add 3.5 inch Chair Rail on top of the existing baseboard. We did this for two reasons. The first was to make the baseboard look much thicker and fancy, but the most important reason is because  we needed a flat 1 inch surface at the top of the baseboard so that when we added the “board and batten” style, the wood would be flush against each other. The chair rail was installed upside down with the 1 inch end facing the ceiling.
All of the trimmings and nailing were completed first. We used a nail gun with a compressor and standard baseboard nails. This made the process quick especially since we own all the tools and were able to accomplish it all without having to rent them. My husband did all the cutting and measuring for every wall and corner.


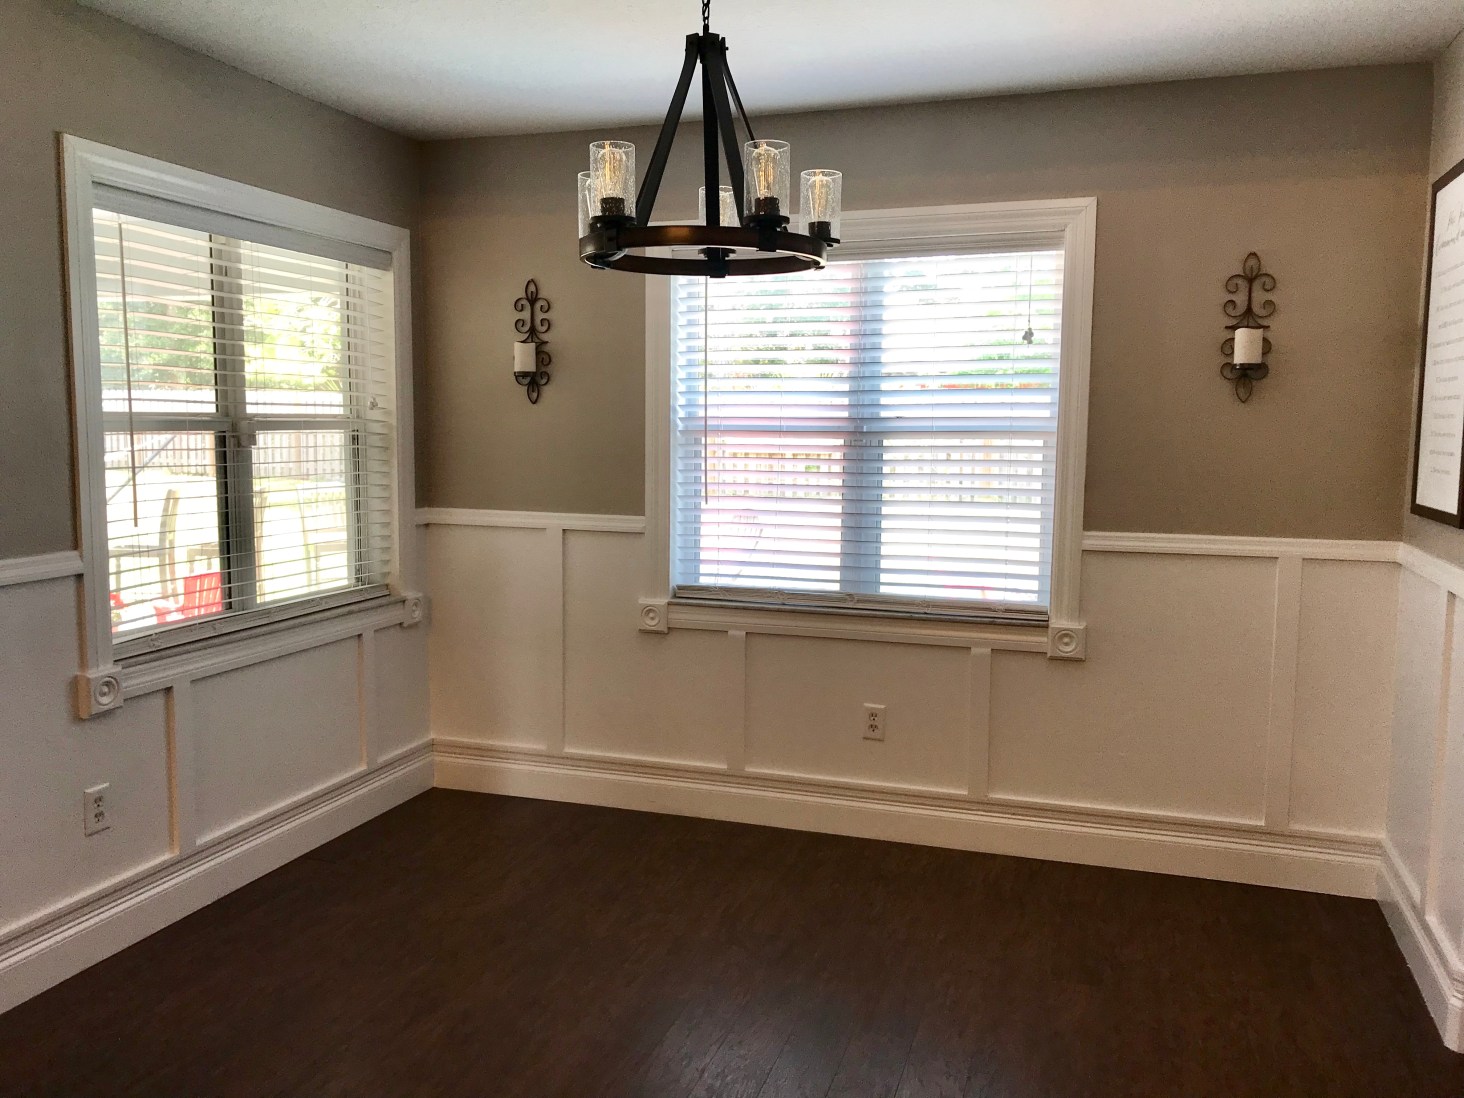
Placing the flat boards were next, we cut them about 36 inches in length and placed them roughly 36 inches apart. They are 1 inch thick, and about 3 inches wide. We did most of the main living areas and hallways throughout the home, so where it looked appealing to the eye we placed the flat boards. You will see in some of the pictures below we added some accents under the windows as well.


Next we used the same Chair Rail again. This time facing the 1 inch thick end towards the floor to perfectly fit together with the board and batten. Now the easiest part of the project is complete. If you are handy with measuring and nailing, getting all the framing nailed should be a breeze.

This is where it gets sticky and messy! This Tape & Drape is a lifesaver. It has painters tape on one end, and plastic drop cloth on the other end. We purchased many of these for the project to keep paint and caulking off the floor.
Everything has to be caulked. We used this paintable latex Caulking. The top of the baseboards, in between the boards, the top of the chair rail and all edges must be caulked to ensure seamless edges once you are ready to paint. It is also helpful to wood putty over any nail holds or extra gaps that may be around the wood.


 Take your time with the painting. This Valspar Paint is worth the $31 a gallon! We used “the perfect white” in semi-gloss. It is easy to wipe clean and great for high traffic areas. Even though it is paint and primer, I still did two coats to be certain everything was covered. I also took this time to paint every door frame and window framing that way all the paint in the living areas matched and had a fresh clean coat.


 The entire home was due for a new style and color scheme so we went with SW Adley Grey. This is a big difference from our green and tan colors we have been comfortable with over the years. I think it was time for a change, something refreshing and relaxing! We also decided to replace all the light fixtures in the foyer, playroom, and kitchen nook area. You can see a peek of them in the final nook picture above. We also replaced all the door handles in the home with beautiful aged bronze handles. Every little detail goes a long way. Being in this home almost 10 years, we have changed decor and colors many times!


I hope you enjoyed seeing some of my before and after pictures of our home project. We strive to do most of our projects together without having to hire someone to do them. It is helpful to start your collection of tools especially if you are a frequent “Do-It-Yourself” type of person.
Thank you for stopping by! I look forward to sharing our next home project with you. If you want to share some of your photos or styles with me, I would love to see them in the comments below. Please share if you know someone who may be exploring the idea of adding some character to their home.
Follow my socials for more pictures @NlutherRealtor
#Heartintoyourhome

– Niki Luther
